
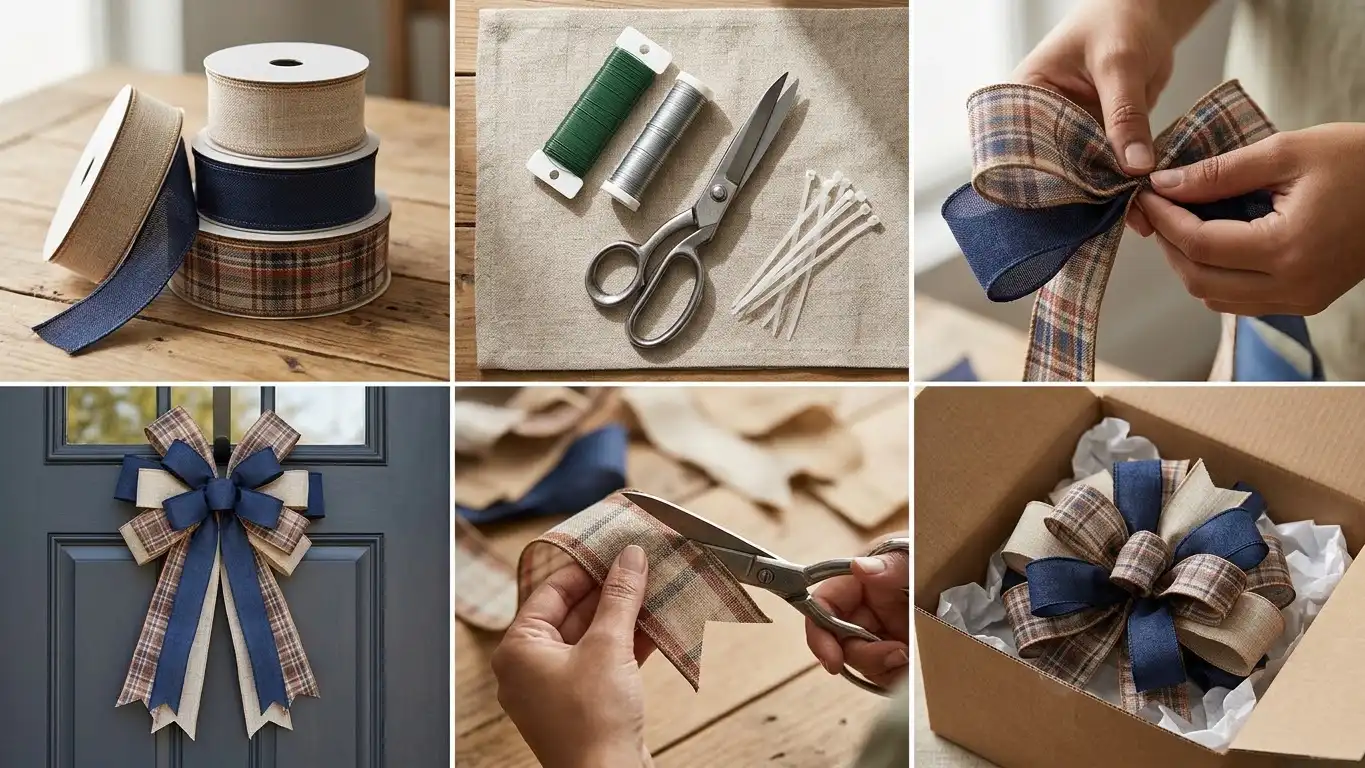
Stacking two or three ribbons into one full bow comes down to pinching alternating loops in your non-dominant hand, securing the center with floral wire, and pulling each layer apart from the back forward. This multi ribbon bow tutorial walks through the exact widths, fasteners, and loop counts that keep layered bows upright on front doors and packages.
Ribbon Widths and Materials That Hold a Layered Shape

Wired edges versus unwired fabric
Wired ribbon has thin flexible metal stitched into both side hems. Without that wire, loops collapse flat within an hour of hanging on a vertical surface. Any bow with wired ribbon tutorial relies on this internal support because it lets you bend each loop into a rounded arch that stays put.
Unwired satin or grosgrain works fine for flat gift boxes lying on a table. It fails fast on wreaths or stair banisters where gravity pulls the fabric straight down. Expect to spend around four to nine dollars per ten-yard spool of wired canvas or burlap in 2026.
Pairing wide base spools with narrow toppers
Start with a 2.5-inch ribbon on the bottom layer to create a sturdy visual foundation. Place a 1.5-inch spool directly on top of it so the narrower strip frames the wider base without hiding it.
If you want a third accent layer, drop down to a 7/8-inch or 1-inch ribbon in the center. Using three identical widths turns the finished piece into a cramped ball where the bottom colors disappear completely.
Check the edge of every spool between your fingers before buying to confirm the wire runs continuously without kinks.
Tools and Fasteners You Actually Need on the Table
Floral wire versus zip ties for the center
Paddle wire in 22-gauge or 24-gauge is the standard fastener for a multi ribbon bow diy because it twists tight without snapping. Cut an 18-inch length before you start pinching loops so you are not fumbling with wire cutters while holding four layers of fabric.
Plastic cable ties in 8-inch lengths work even better if your hands fatigue easily. You slide the tie around the pinched waist, pull it snug with one tug, and clip the excess tail flush with wire snips. A pack of one hundred zip ties costs around five dollars in 2026 and never cuts into your fingertips.
Using a peg bow maker versus working by hand
A wooden peg board holds the ribbon center for you while you build each layer. This helps when you are stacking four or more spools and your thumb starts to cramp.
Hand pinching gives you tighter control over the twist at the center and costs nothing. For an easy bow with ribbon using just two spools, your fingers are faster than setting up a board.
Keep dedicated fabric shears at your workspace because paper scissors chew up wired edges and leave frayed threads.
Multi Ribbon Bow Tutorial Step by Step Using the Hand Pinch Method

Cutting tails and building the bottom loop layer
Leave the ribbon on the spool while you work so you never cut a strip too short. Measure a 10-inch tail from the cut end and pinch the fabric tightly between your thumb and index finger.
Form a 6-inch loop to the left, bring the ribbon back to your pinch, and give it a half twist so the printed side faces forward again. Make a matching 6-inch loop to the right and twist once more. Repeat until you have three loops on each side for the bottom layer.
Stacking the middle and top loops in under five minutes
Following a multi ribbon bow tutorial step by step gets much faster once you use the 3-2-1 loop method. After finishing your three bottom loops per side, lay your second narrower ribbon directly over your thumb pinch with a matching tail hanging down.
Make two loops on each side that measure 5 inches long, twisting at the center every time. Add your third ribbon on top with a single 4-inch loop on each side. This multi ribbon bow tutorial easy formula comes together in under five minutes once your spools are unrolled.
Cinching the center without crushing the wire
Slide your floral wire or zip tie straight through the center pinch while keeping firm pressure with your thumb. Pull the fastener tight enough that the ribbon bunches into a narrow waist.
Do not yank so hard that the metal edge wire snaps or bends at a sharp ninety-degree crease. Leave the wire ends long on the back so you can tie the bow directly onto a wreath frame or lantern handle.
Twist the bow itself rather than the wire ends to lock the center tightly without breaking the metal.
Sizing and Scale for Wreaths Gifts and Garlands
Proportions for front door wreaths and lanterns
A standard 24-inch front door wreath needs a bow that spans 10 to 12 inches across. Any big ribbon bow tutorial for outdoor decor uses 6-inch loops on the base layer and tails cut to at least 14 inches so the silhouette reads clearly from the sidewalk.
Lantern toppers require smaller loops around 4 inches wide so the fabric does not swallow the glass panels. Keep tails short enough to clear the metal latch or let them drape cleanly down one side corner.
Scaling down for gift boxes and narrow baskets
Gift packages look overwhelmed when a bow covers more than a third of the box lid. Drop your base width to 1.5 inches and keep your longest loops at 3.5 inches.
These scaled-down ribbon bow ideas also work well on bread baskets, wine bottles, and cupboard doors where bulky wire gets in the way of daily use.
Measure the width of the object you are decorating first and aim for a finished bow that is roughly one-third that size.
Color and Pattern Mixing Without Visual Clutter
Balancing busy prints with solid textures
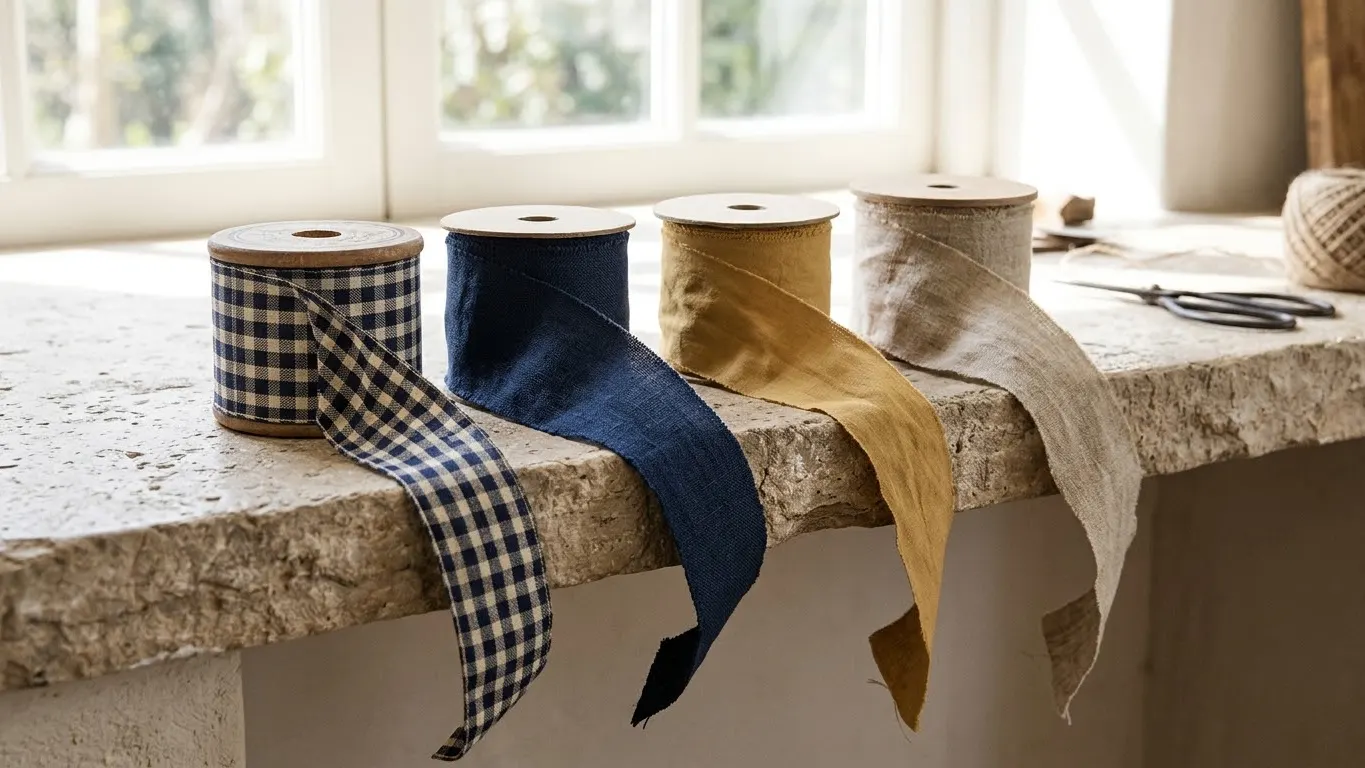
Pair one patterned spool with one solid textured ribbon like faux linen, burlap, or velvet. Putting plaid, polka dots, and florals into the same pinch creates visual noise where none of the patterns stand out.
Pull one secondary color out of your main print to choose the solid base. If a striped ribbon has thin navy lines on cream fabric, a solid navy base anchors the whole piece.
Understanding the ribbon and bow difference in styling
Knowing the ribbon and bow difference helps you decide when to stop adding layers. Ribbon is the flat continuous material that provides color and trailing movement, while the bow is the structured focal point built from folded loops.
Different ribbon bows shift that balance. A bow with short loops and 24-inch flowing tails emphasizes the drape of the fabric, while tight stacked loops highlight the geometric shape.
Lay your chosen spools side by side in natural daylight before cutting to make sure the undertones actually match.
Finishing Tails and Fluffing Loops So They Stay Full
Dovetail cuts versus angled snips
Fold a ribbon tail in half lengthwise so the wired edges meet. Cut diagonally from the folded center outward toward the wired tip to form a sharp V-shaped dovetail.
On narrow 1-inch ribbons, a dovetail looks cramped and frays fast. Use a single crisp forty-five-degree diagonal snip instead.
Pulling loops outward from the back layer first
Good ribbon bow instructions always save the fluffing for after the bow is tied onto its final surface. Pushing against a solid wreath frame gives you leverage to pull each loop firmly away from the center.
Start with the bottom layer and spread those loops out like a fan. Move to the middle layer next, nesting each loop into the open gaps between the bottom loops. Finish by rounding out the top center loop with two fingers inside the arch.
Pull the tails downward and run your fingers along them to create a gentle wave rather than leaving them stiff and flat.
Common Errors and Where Layered Bows Fail

Why heavy velvet sags on outdoor doors
Thick double-faced velvet looks rich indoors, but it absorbs humidity on an uncovered porch. Once damp, the heavy pile weighs down the edge wire and causes the top loops to droop forward.
Skip velvet and paper-backed ribbons anywhere rain or morning dew can reach them. Polyester canvas and nylon mesh shed moisture and bounce back after wind gusts.
Fixing lopsided loops and twisted backsides
If one side looks fuller than the other, you probably skipped a half-twist at the center pinch. Without that twist, one loop shows the dull underside of the ribbon and sits at a different angle.
You do not need to untie the whole piece to fix minor unevenness. Tug gently on the shorter loop from the center outward while holding the wire tight, and the slack will slide through the pinch.
Skip trying to salvage a bow whose center wire has gone loose because a wobbly core will never hold its shape.
Upkeep and What Changes After Months of Display
Reshaping crushed wire after seasonal storage
Packed away in a plastic bin, even high-grade wired loops flatten out by the next season. Slide two fingers into each crushed loop and press outward toward the wire seam to restore the rounded dome.
If the tails have picked up hard creases from storage, run a hair dryer on low heat over the fabric for ten seconds while smoothing the wire straight with your hand. Never press a hot iron directly onto synthetic mesh or glittered prints because they melt instantly.
Sun fade and moisture damage on porch decor
Direct afternoon sunlight fades red, navy, and deep green ribbons noticeably within eight to twelve weeks. Flipping the bow or rotating it to a shaded entry extends its life by another season.
Thin metal edge wire can also rust after months of rain exposure, leaving orange stains along light-colored fabric. Spraying outdoor bows with a clear fabric protector before hanging slows both fading and rust.
Store finished bows inside a rigid cardboard box stuffed with crumpled tissue paper inside each loop so they keep their volume.
Frequently Asked Questions About Layered Ribbon Bows
Can you make a two ribbon bow without floral wire
Yes, you can tie the pinched center with a narrow strip of unwired ribbon, jute twine, or a thin chenille stem. Pipe cleaners are especially forgiving for beginners because the fuzzy coating grips the fabric and stops the center from slipping while you twist.
How much yardage does a full wreath bow take
A three-layer wreath bow with 6-inch base loops and 14-inch tails uses roughly three yards of the base ribbon, two yards of the middle ribbon, and one and a half yards of the top accent ribbon. Always keep an extra half yard on hand if you want longer streaming tails.
Do you need a glue gun to secure the center knot
Hot glue is unnecessary for holding the loops together and actually makes it harder to adjust lopsided sides later. The only time a dot of glue helps is when wrapping a small scrap of ribbon around the center to hide a plastic zip tie.
Putting Your First Layered Bow Together
Grab two wired spools in contrasting widths, cut an 18-inch piece of floral wire, and practice the pinch-and-twist motion once before worrying about exact tail lengths. This multi ribbon bow tutorial works best when you treat the wire like a flexible frame that you can keep shaping until the loops sit right where you want them.