
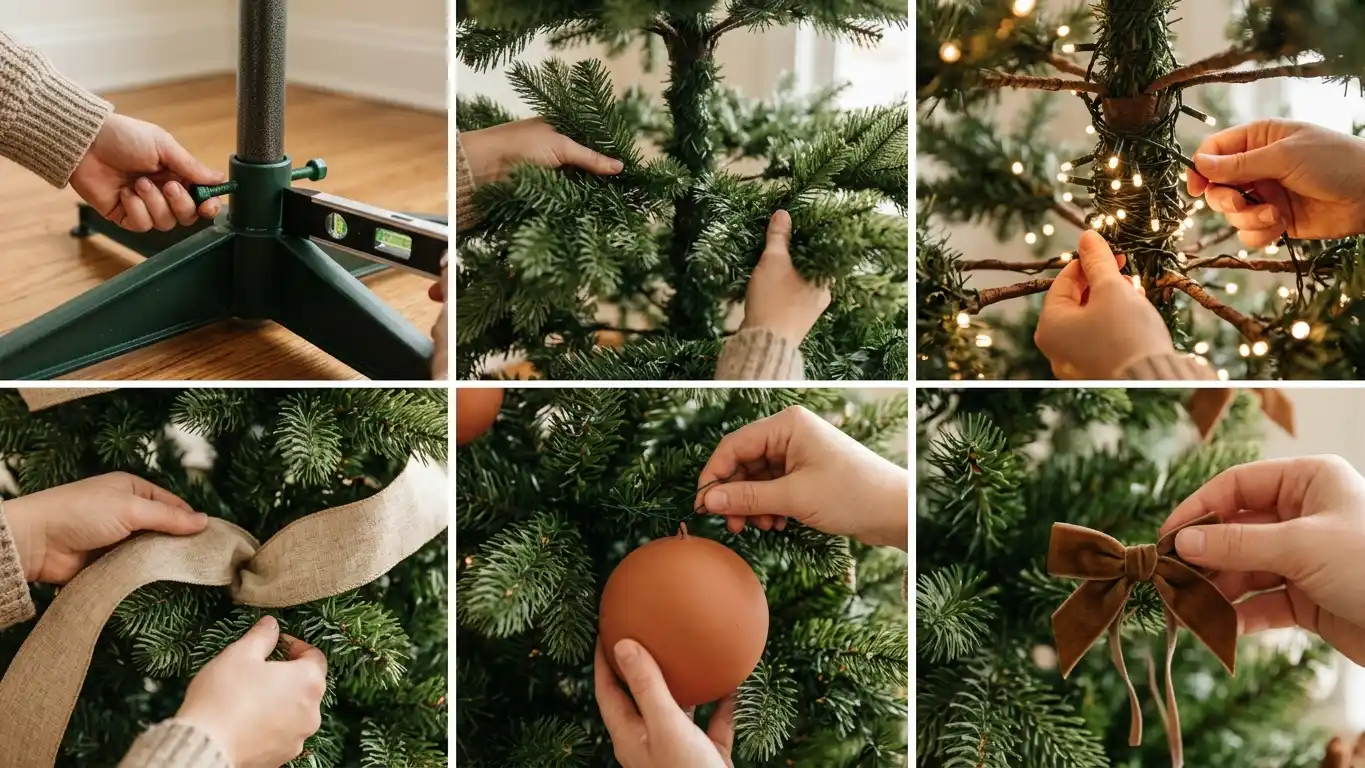
Setting up an artificial or freshly cut evergreen demands an orderly build process so you avoid tangled cords, bare spots, and broken heirloom glass. This walkthrough shows you how to choose, assemble, light, and style your centerpiece using tested measurements and practical wiring methods that stay secure throughout the season.
What you need:
- Seven to eight foot artificial or live evergreen
- Four hundred to eight hundred LED micro cluster lights on green wire
- Two spools of two and a half inch wired ribbon, twenty yards total
- Sixty to one hundred assorted ornaments across three distinct diameter sizes
- One pack of twenty two gauge green floral wire
- Two to three bunches of natural cedar or silver dollar eucalyptus picks
- Heavyweight tree stand with a minimum four quart water basin for live boughs
- Padded branch gloves and step ladder
Assemble the Stand and Test the Power Footprint
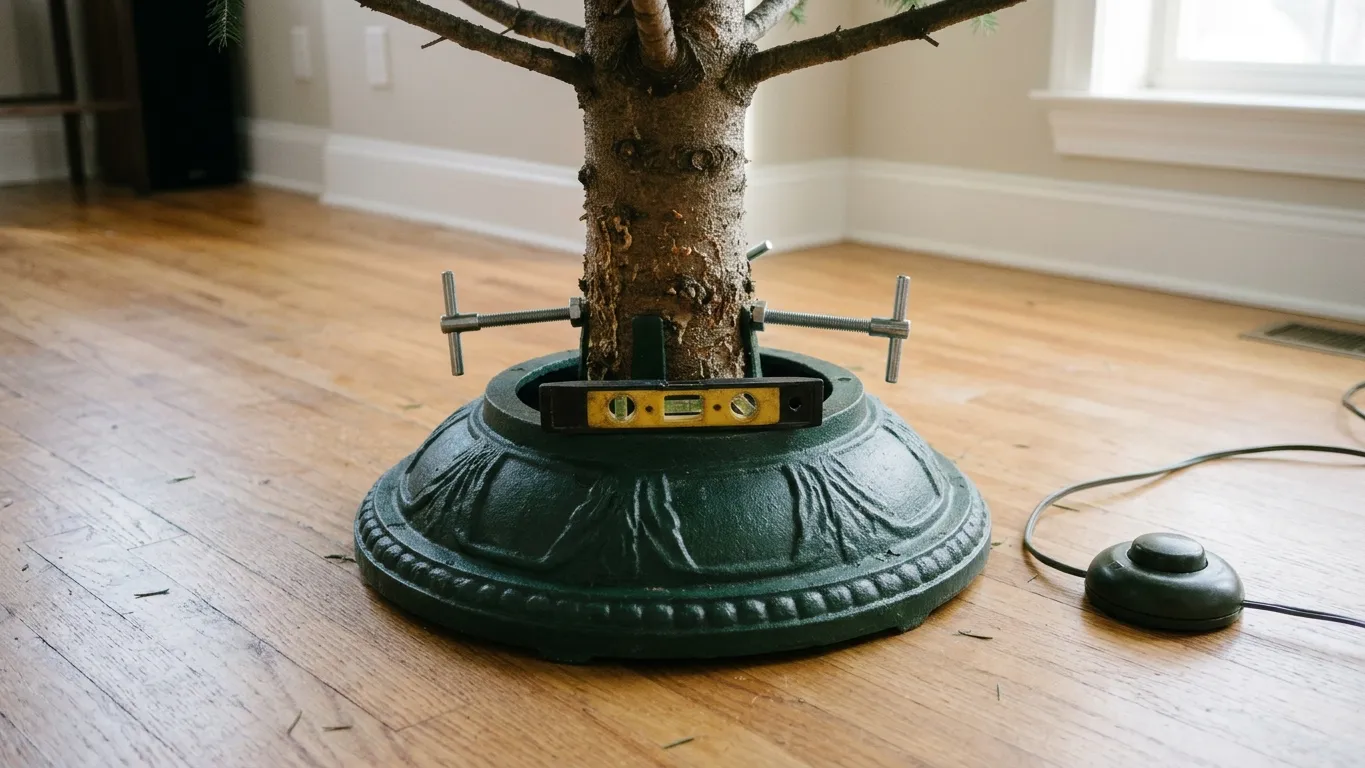
Drop your stand base exactly where the tree will sit for the month. Moving a fully decorated fir risks bent center poles and shattered glass. Measure a clear forty inch perimeter from any active heat register, radiator, or wood stove to prevent artificial needles from warping and cut timber from drying out prematurely.
Plug your multi-outlet power strip into the wall receptacle. Run an inline foot pedal switch directly under the skirt perimeter so you never crawl beneath low boughs to disconnect power.
Level the bottom trunk collar by tightening the three tension bolts in quarter turn increments. Use a magnetic torpedo level against the center post to confirm vertical alignment before tightening the locking ring.
Shape and Fluff the Inner Branch Core
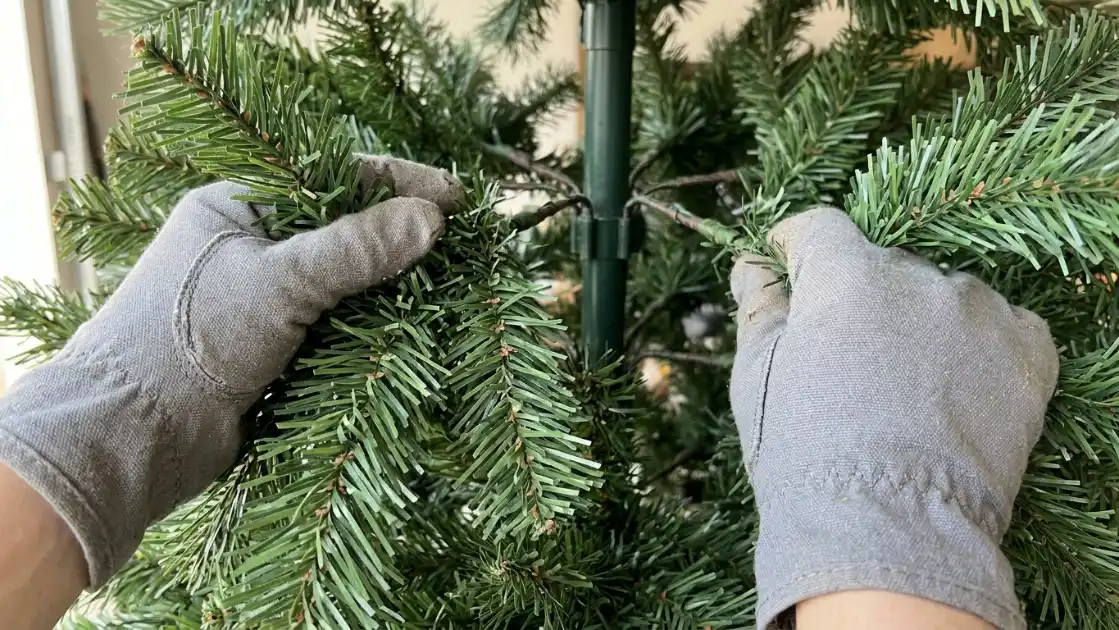
Work systematically from the lowest branch hinge upward. Pull the back wire stems out at sharp forty five degree angles to disguise the metal center post. Spread the secondary plastic tips in an alternating up and down fan pattern to build dense visual volume near the spine.
Spend at least forty minutes on this foundation step. Skipping inner branch shaping leaves gaping horizontal voids that expose electrical cords and cheap clip brackets.
Inspect each metal hinge pin as you drop section two into the base receiver. Bend the outer three inches of every branch tip upward by twenty degrees. That upward hook creates an anchor point that prevents heavy glass baubles from sliding off during holiday traffic.
Route the Trunk and Depth Lighting
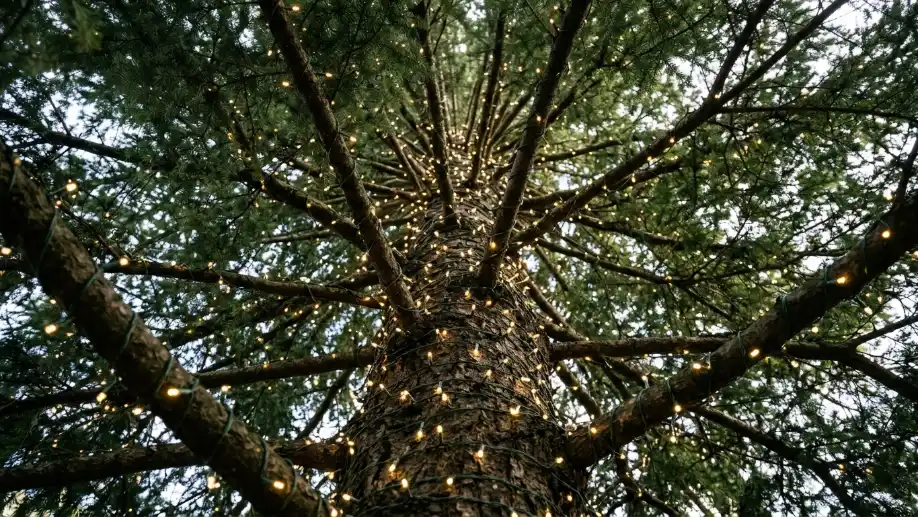
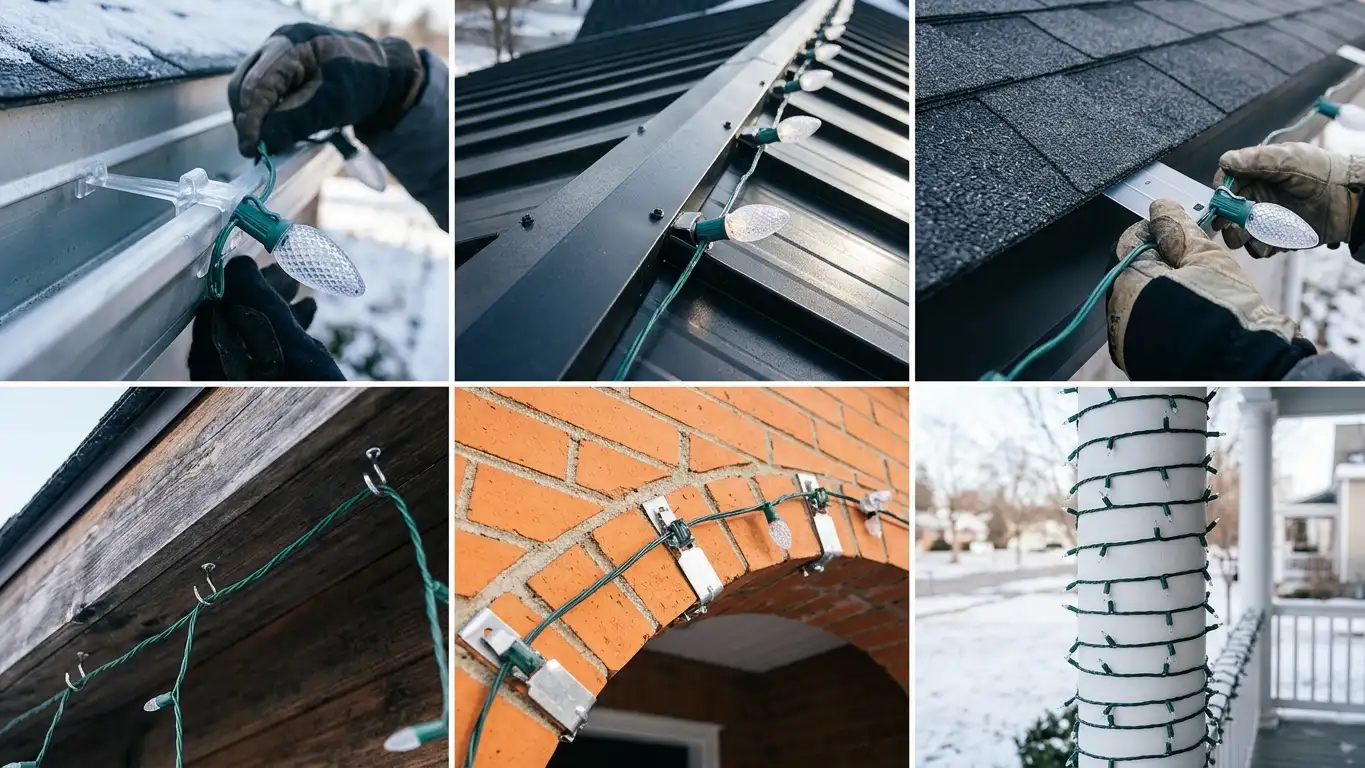
Tuck your light strands starting from the bottom tier right next to the central spine. Run twenty percent of your total bulb count tightly along the inner pole to generate an amber glow that shines through the interior gaps.
Wrap the remaining line out along the top of each primary branch toward the tip, loop the cord once around the needle cluster, and track back along the underside to the trunk. This inward and outward weaving path prevents straight horizontal wires from cutting across the natural foliage silhouette.
Count on one hundred lights per vertical foot of tree height as your minimum baseline. For an eight foot model, eight hundred micro warm white diodes deliver balanced coverage without hot spots.
Tuck Mixed Botanical Greenery Picks
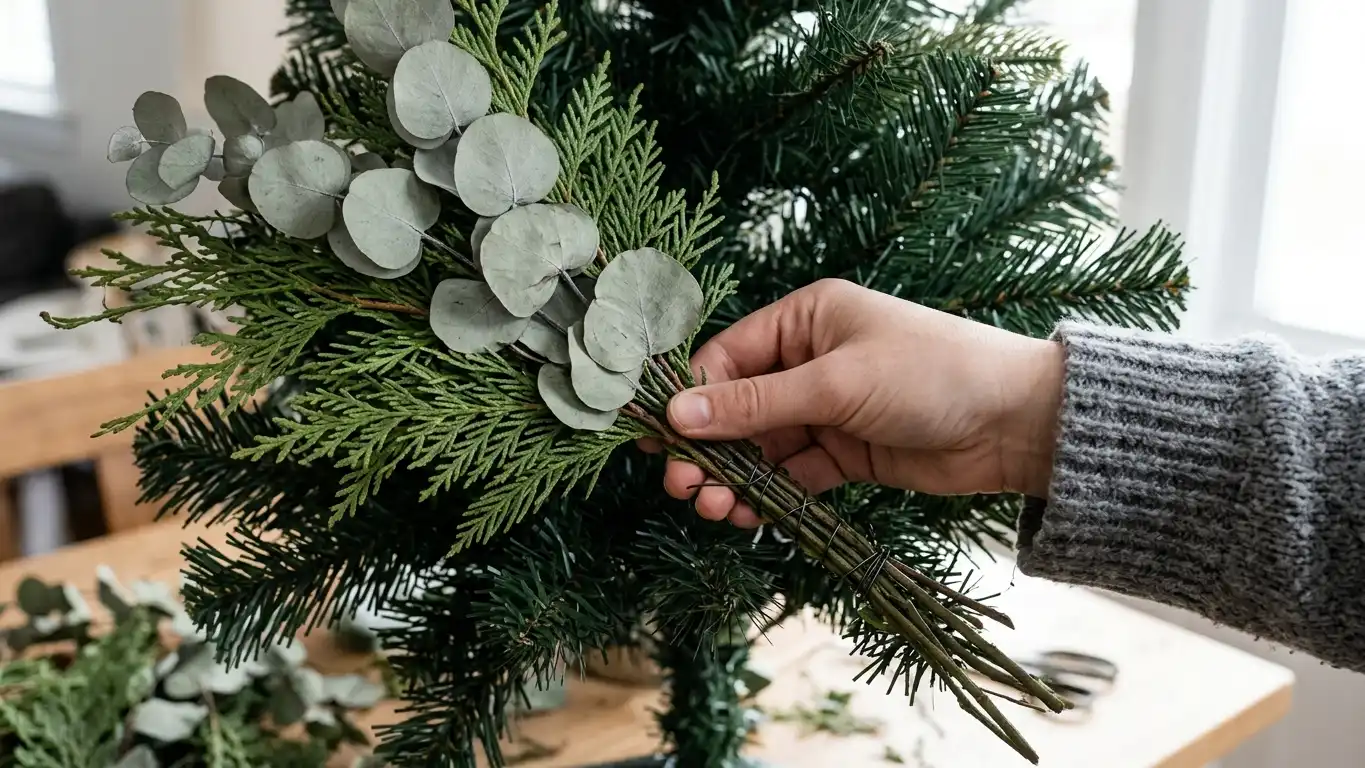
Slide bundles of contrasting foliage deep into the frame to break up artificial plastic textures. Mix several shades of greenery throughout your tree instead of relying on one type. Real Fraser fir branches, dried eucalyptus stems, and preserved juniper sprigs introduce rough textures that catch the light differently than molded PVC needles.
Insert these branch extenders at a thirty degree downward angle along the mid section boughs. Secure the wire base of each pick to a structural branch spine using twenty two gauge green floral wire.
Expect to spend around forty to sixty dollars in 2026 for ten quality wired accent sprays. Space them roughly fourteen inches apart across the middle third of the canopy.
Cascade Layered Wired Ribbon Downward
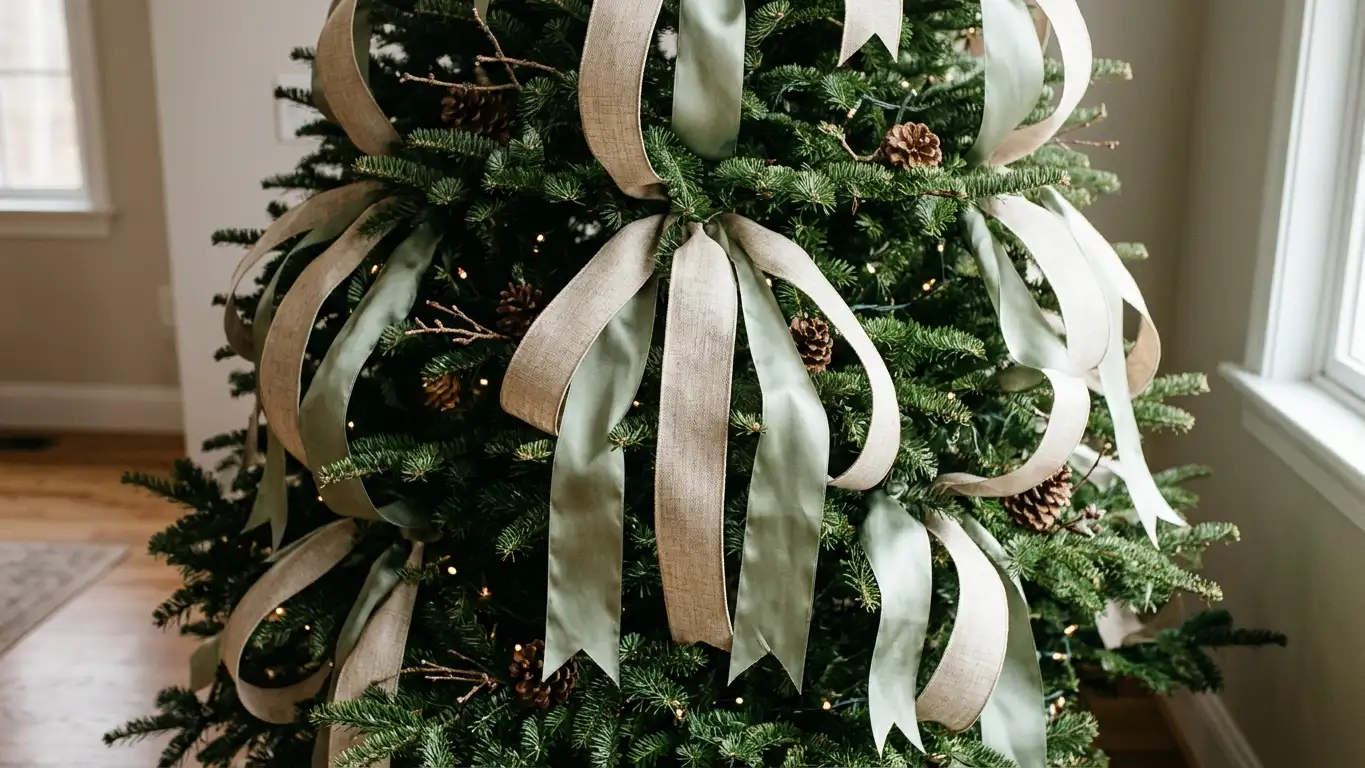
Anchor your ribbon tails six inches below the terminal branch using green wire ties. Working with two distinct ribbons, such as a two and a half inch raw silk band paired against a four inch open weave linen, builds tailored depth.
Fold the ribbon into loose twelve inch billowing loops rather than wrapping the tree like a barbershop pole. Pinch the ribbon base between your thumb and forefinger, push the gathered knot four inches back into the foliage, and wire it directly to an inner limb.
Angle the trails diagonally across the frame so the fabric catches the interior light. Cut every tail end on a sharp forty five degree chevron angle to halt fraying.
Hang the Oversized Interior Base Baubles

Push four inch to six inch sphere ornaments deep into the interior foliage near the main pole. These large spheres reflect light from the core bulbs and visually ground the entire evergreen.
Hang these base pieces on three inch lengths of florist wire rather than loose thread loops. Crimp the wire tightly around the parent limb so pets or passing children cannot dislodge the heavy glass.
Use matte terracotta, brushed pewter, or deep bronze finishes for this hidden tier. Shiny mirror spheres in the deep core produce harsh circular flares, while matte finishes produce soft background contrast that highlights your delicate outer pieces.
Build Balanced Focal Clusters
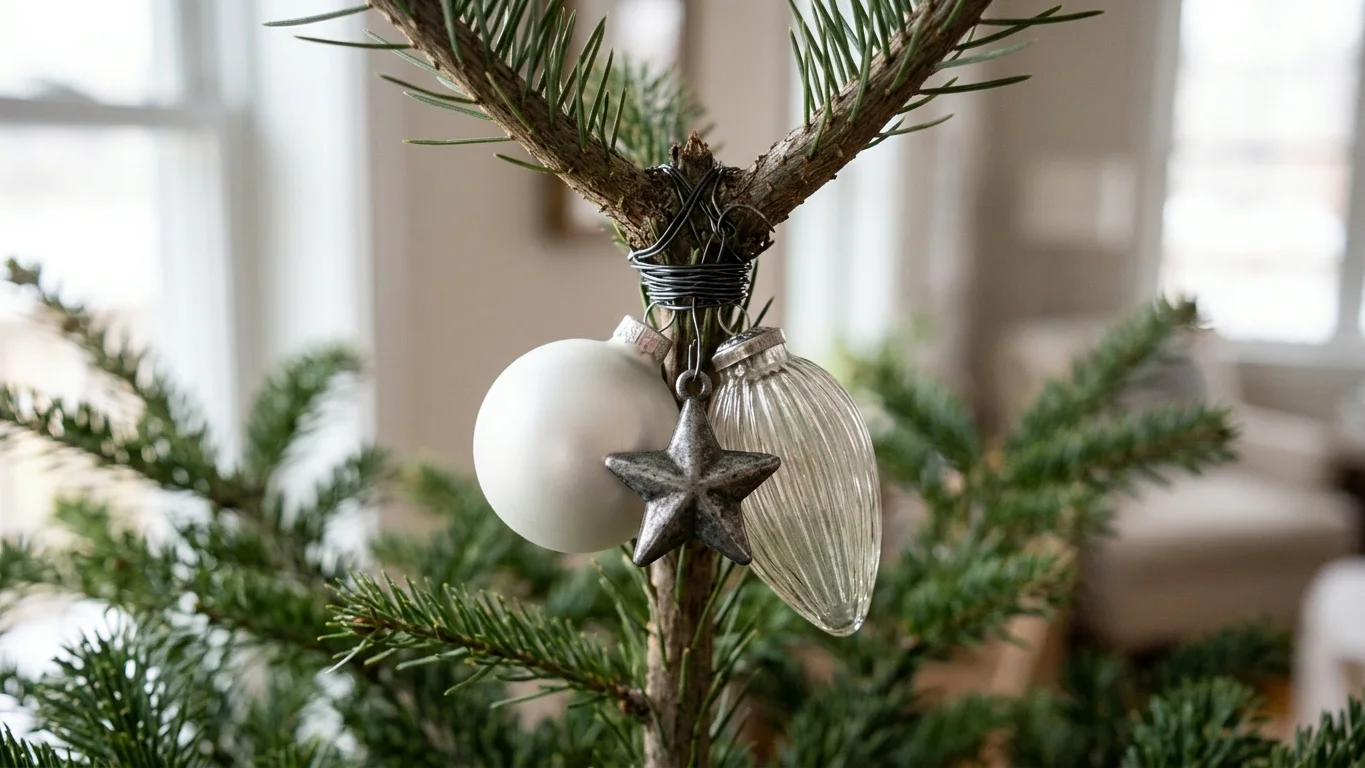
Group ornaments in trios containing one smooth sphere, one textured finial, and one figural piece. Thread all three mounting loops onto a single five inch piece of wire to bind them into a tight structural cluster.
Seat these compound groups into the mid bough notches where the main branches fork. This technique brings visual weight to flat gaps without pulling down branch tips.
Vary the height of each cluster across the tree profile to keep the eye moving. Place larger seven inch groupings on the lower tiers, tapering down to four inch pairings across the upper quarter to maintain balanced proportions.
Suspend Delicate Specialty Pieces on Outer Tips

Hang your fragile mouth blown glass, heirlooms, and intricate filigree pieces exclusively on the outer four inches of sturdy upper branches. Keep these keepsakes at least thirty inches above the floor level if you have toddlers or dogs running through the room.
Check the branch tension before letting go of expensive ornaments. If a branch sags more than one inch under the ornament weight, shift the piece two inches inward toward the sturdier wood core.
Position specialty pieces directly in front of a warm LED diode to illuminate the inner glass paint. Leave two inches of clear vertical drop beneath every specialty ornament so it can swing freely without clicking against lower branches.
Fasten the Tree Skirt and Base Collar
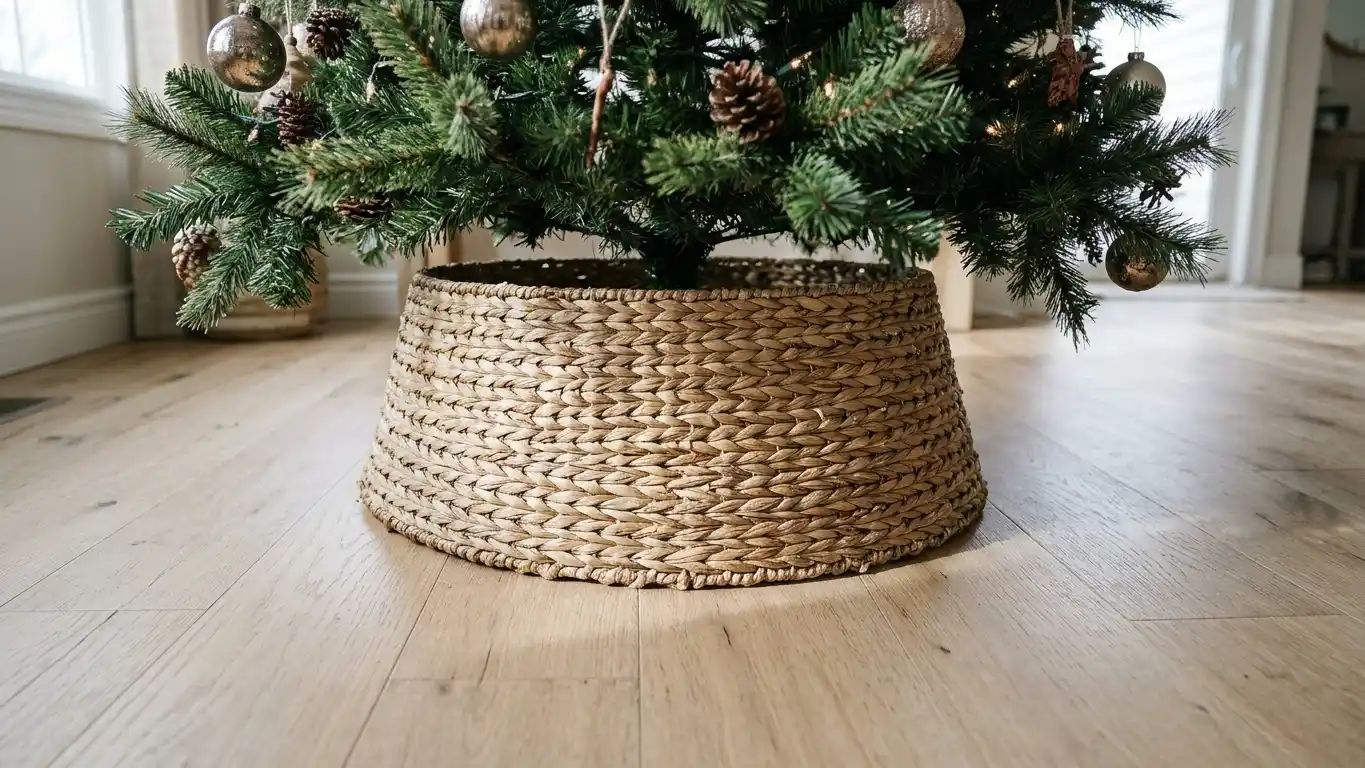
Slide your tree skirt or woven seagrass collar around the metal stand before placing your lowest gifts. A woven collar needs to sit flush against the floor to hide the metal hardware and bulky extension block completely.
If using a fabric skirt, pick a diameter that extends six inches past the widest branch tips. A narrow skirt creates an awkward mushroom silhouette that throws off the room balance.
Smooth out wrinkles and use flat safety pins along the rear overlap seam to keep the fabric closed. Tuck your power foot switch right beneath the rear slit for quick evening access.
Secure the Structural Tree Topper
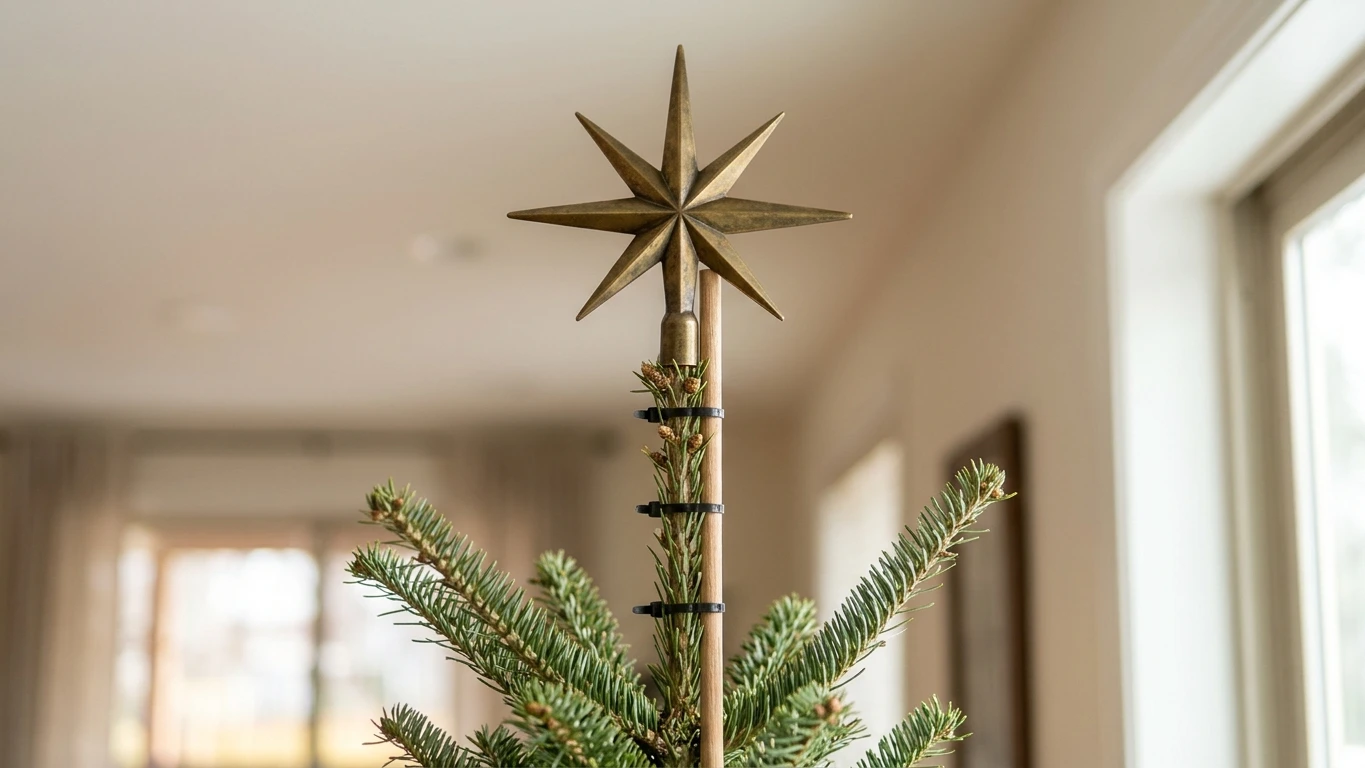
Mount your topper hardware directly to the central vertical branch using a rigid support rod. Many commercial toppers tilt sideways because the single natural evergreen tip bends under heavy stars or angels.
Splint the center leader branch by placing an eight inch wooden dowel or green fiberglass rod alongside the trunk pole. Lash the rod and the top branch together with three zip ties pulled taut.
Slide the mounting tube of your topper over this reinforced dowel. This setup keeps heavy glass spires or wrought iron stars perfectly plumb throughout the holiday month without snapping the upper foliage.
Add Accent Bows and Final Ribbon Details

Tie structural four loop bows using wired velvet ribbon and anchor them along bare outer branch intersections. In 2026, decorators lean heavily toward understated tailor bows with eight inch tails rather than massive puffy tree toppers.
Instead of relying on glitter alone, this theme embraces layered ribbon, oversized bows, dimensional ornaments, and rich textures that create visual interest from every angle. Pinch each bow knot firmly with floral wire and twist the wire tails around the thickest joint of the branch.
Trim the ribbon tails so they brush the needles below without tangling into ornament wire hooks. Keep the bow count between nine and twelve for a standard seven foot tree to prevent fabric clutter.
Troubleshooting Branch Sagging and Balance Failures
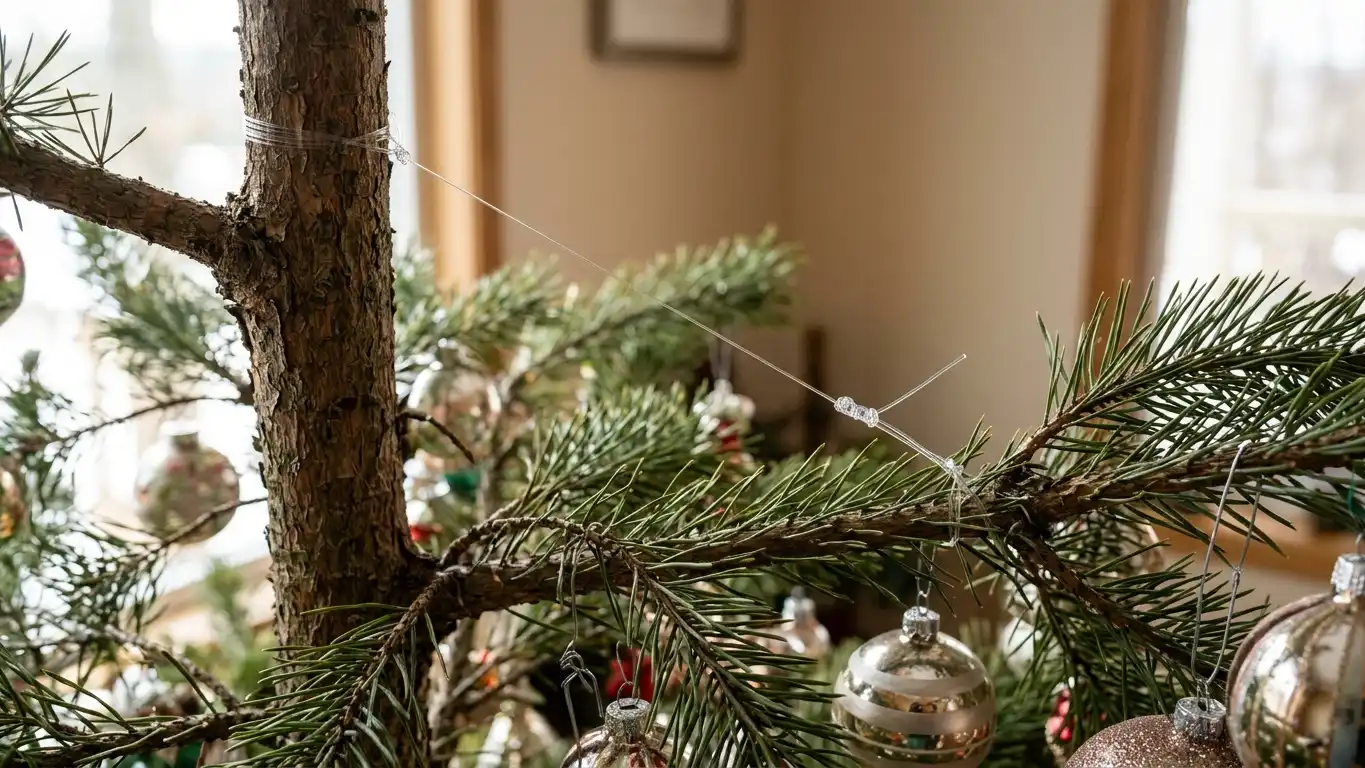
When a lower branch drops under weight, run a clear twelve pound monofilament fishing line from the sagging branch up to the main trunk hinge directly above it. Tie an adjustable slip knot to pull the drooping limb back to a horizontal plane.
If an entire side of the tree appears sparse due to manufacturer error or lost branches, rotate the bare section toward a wall or window corner before hanging your base baubles. You can also wire two preserved evergreen picks together and insert them into the center post socket to manufacture artificial branch density.
Blown fuses in incandescent strings usually happen when you link more than three consecutive sets. Switch to low voltage LED micro lights on green wire to run up to ten sets from a single outlet without tripping internal thermal safety fuses.
How to Decorate a Christmas Tree with Restraint

Step back ten feet from the tree every fifteen minutes during the decorating process to check your density balance. Squint your eyes slightly; this filters out fine details and shows you the raw distribution of dark voids and light clusters.
Remove one ornament from every cluster if the branches begin to look crowded. Negative space between branches allows individual heirloom ornaments to stand out clearly instead of getting lost in visual clutter.
Limit your palette to three primary colors and two hardware finishes. Mixing polished brass, pewter, matte ceramic, and raw wood all at once makes the tree look messy rather than curated.
The Best Order for Taking the Tree Down

Pack your ornaments away in reverse sequence, starting with delicate outer glass and working inward to the ribbon and base spheres. Store fine pieces in partitioned archival boxes with acid free tissue paper to prevent pigment fading and glass abrasion.
Wrap light sets around heavy corrugated cardboard spools starting with the female plug. This step ensures the male plug unrolls first next winter, saving hours of cord untangling.
Vacuum dropped needles immediately after lifting the skirt. If you have an artificial tree, compress the branches gently toward the pole, fasten two nylon luggage straps around each section, and slide the segments into a heavy canvas storage bag.
Christmas Tree Ideas 2026: Frequently Asked Questions
When should I take my tree down in 2026?
Tradition marks the Twelfth Night on January 5 or the Feast of the Epiphany on January 6 as the standard window to remove holiday greenery. Live evergreens kept past four weeks in dry, heated living rooms become extreme fire hazards and should come down as soon as needle shedding accelerates.
How do I stop my cat from pulling down low hanging ornaments?
Hang only flat shatterproof wooden ornaments or pressed felt pieces along the bottom twenty four inches of the trunk. Squeeze a few drops of bitter citrus oil onto the lower artificial branch tips to deter pets from chewing on cords and needles.
What is the safest way to water a live cut evergreen?
Pour warm tap water into the basin twice daily for the first seven days, as a fresh cut trunk can drink up to a gallon per day. Never let the water line drop below the base of the cut trunk, or dried sap will seal the bark pores within two hours and stop all future water absorption.
Why did my LED light strand suddenly stop working mid branch?
A loose bulb seated improperly in its plastic socket breaks the series circuit on traditional strings. Inspect the strand for bent copper contact pins beneath individual bulb casings, or replace the tiny slide out fuse housed inside the male plug slider door.
Managing Your Holiday Setup Workflow
Executing this sequence from trunk leveling to final bow placement keeps your workspace clean and prevents damaged decor. Take your time shaping the inner branches, wire your lighting along the interior frame first, and balance large foundation baubles before placing fragile pieces. A methodical approach ensures your tree remains sturdy, balanced, and bright from late November straight through the new year.